Spring brings new colors and fresh styles. Acrylic nails serve as a hard, smooth canvas for nail art. This guide gives you 30 acrylic nail ideas for April. You will find simple steps and clear advice. The guide uses clear language and short sentences. It answers common questions and offers useful tips for nail care, tools, and maintenance.
The guide also explains the basics of acrylic nails. It shows you how to create designs that match the season. You will learn how to make pastel effects, floral patterns, geometric shapes, and other ideas. The text uses common words and avoids confusing phrases. The guide focuses on clear steps and short explanations.
Many readers want to update their style for spring with acrylic nails. Whether you work in a salon or do nail art at home, you can follow these ideas. This guide meets the needs of people with various goals. It uses simple language and an easy format for a smooth reading experience.
What Are Acrylic Nails?
Acrylic nails are an artificial nail option. A technician mixes a powder and liquid to form a hard coating. The coating cures quickly and becomes strong. Acrylic nails do not chip as fast as some other options. They offer a long-lasting base for nail art.
- Strength: Acrylic nails hold up well during daily activities.
- Smooth Surface: They provide a flat and even surface for painting.
- Customization: You can add paints, glitters, and patterns easily.
- Maintenance: Fills or touch-ups every 2 to 3 weeks help maintain them.
Acrylic nails work well for simple designs and elaborate art. Learn how to shape and polish them to get the best results.
Seasonal Inspiration for Spring Nails
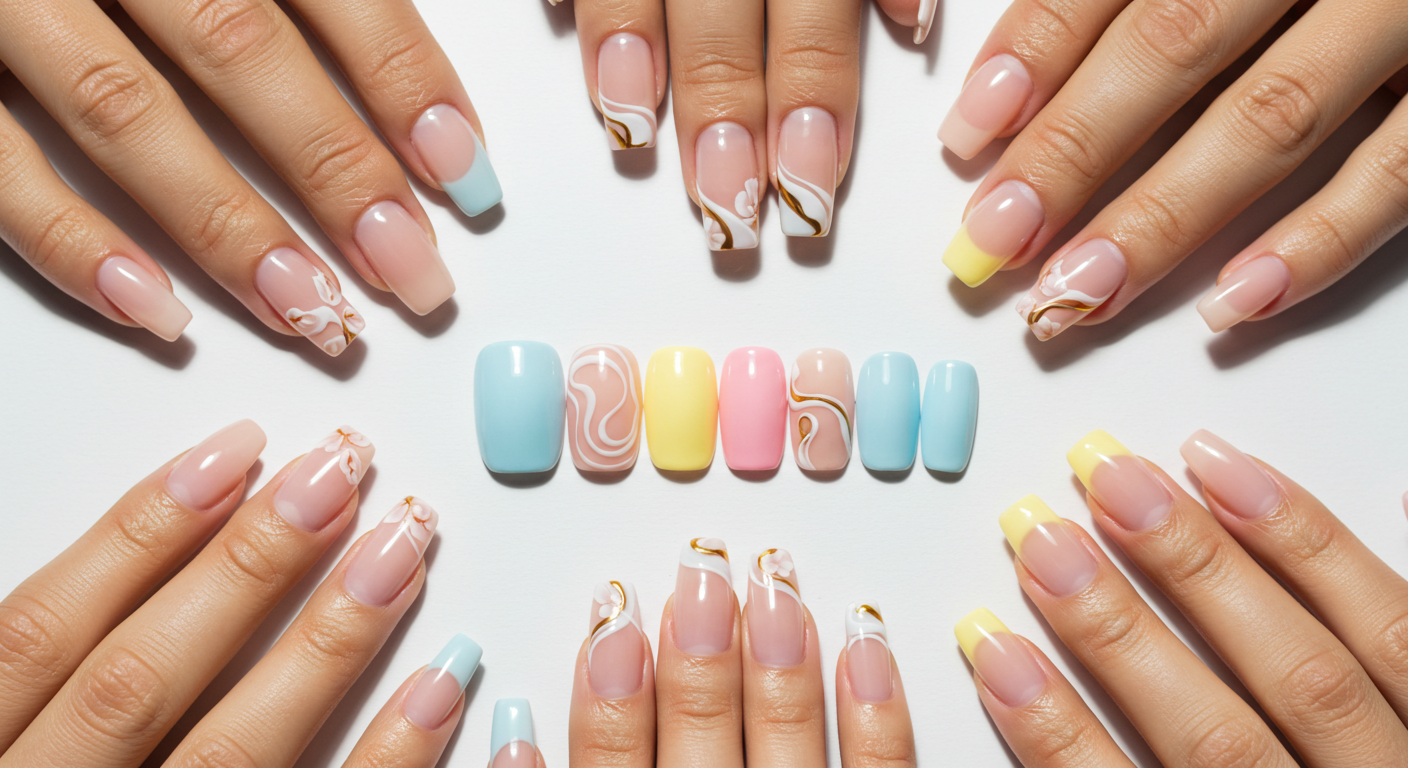
April brings bright colors and soft pastels. Flowers and nature drive many design choices. Here are simple ideas for creating a spring look:
- Pastel Colors: Use light tones such as pink, blue, lavender, and mint.
- Bold Accents: Choose a strong color or metallic edge to add interest.
- Floral Designs: Draw small flowers or add printed decals.
- Geometric Shapes: Create lines and angles using tape or striping tools.
- Textured Effects: Add glitter or 3D elements for a lively look.
These ideas use colors and simple patterns that match the season. They offer a mix of calm and bright effects. Follow the tutorials for each design to get clear instructions.
S
30 Must-Try April Nail Ideas
Below are 30 nail ideas. Each idea uses acrylic nails and works well in spring. The list gives design tips and clear steps.
1. Pastel Ombre Nails
- Design: Blend pastel tones such as light purple and pale pink.
- Tips: Dab the colors using a makeup sponge. Use a clear top coat to finish.
2. Floral Patterns
- Design: Paint a solid pastel base and add flower designs.
- Tips: Use a small brush or dotting tool to draw flowers. You may add a hint of metallic paint.
3. Geometric Shapes
- Design: Divide nails into sections using bold lines.
- Tips: Use nail striping tape for clear divisions. Add a neon color for contrast.
4. French Style with Pastel Tips
- Design: Replace the standard white tip with a soft pastel color.
- Tips: Brush carefully on the tip and blend slowly into the base color.
5. Single Glitter Accent
- Design: Paint one or two nails with glitter polish.
- Tips: Use a reliable glitter polish on an accent nail. Apply clear top coat to set the glitter.
6. Abstract Art
- Design: Create free-form abstract lines with pastels.
- Tips: Use brushes of different sizes. Dab and blend to achieve a smooth effect.
7. Metallic Accents
- Design: Add metallic foil or powder on a pastel base.
- Tips: Brush a thin adhesive layer where you want the metal to stick.
8. Marble Effect
- Design: Create a marble look with swirling lines and white streaks.
- Tips: Drip two or more colors on the nail and tilt to create swirls. Brush lightly to blend.
9. Neon Accents
- Design: Mix neon details on a pastel background.
- Tips: Use neon polish for stripes or dots. Apply sparingly to create a bright effect.
10. 3D Floral Elements
- Design: Sculpt small flowers with 3D nail products.
- Tips: Place small acrylic dollops on selected nails. Shape them with fine tools.
11. Matte Base with Glossy Tips
- Design: Apply a matte finish over most of the nail. Add a glossy tip.
- Tips: Use striping brushes to separate the matte and glossy parts.
12. Color Blocking
- Design: Divide nails into areas of two or three solid colors.
- Tips: Apply nail tape to create clean lines. Remove tape after painting.
13. Pearl Details
- Design: Add small pearls on a pastel background.
- Tips: Use a dotting tool to place each pearl. Secure with a top coat.
14. Watercolor Wash
- Design: Create a light watercolor effect on the nails.
- Tips: Use a wet brush to allow colors to blend naturally. Keep the effect soft.
15. Freeform Shape Patterns
- Design: Draw free shapes that look natural and relaxed.
- Tips: Combine two or three pastel shades. Draw lines and curves by hand.
16. Holographic Touch
- Design: Use holographic polish on selected nails.
- Tips: Apply a small amount of holographic powder. Blend over a light base color.
17. Crackle Pattern
- Design: Apply a crackle polish that creates a cracked effect.
- Tips: Follow the polish instructions. Wait for the crackle to appear before using a top coat.
18. Tribal Lines
- Design: Draw simple tribal patterns with thin lines.
- Tips: Use a steady hand and a fine brush. Choose two colors for contrast.
19. Solid Monochrome
- Design: Paint each nail with one solid color.
- Tips: File and shape your nails evenly. Choose a high-quality monochrome polish.
20. Negative Space
- Design: Leave part of the nail unpainted to create a negative space effect.
- Tips: Use tape to mark the unpainted area. Paint the rest of the nail.
21. Metallic French Tips
- Design: Use a metallic polish for the nail tip instead of white.
- Tips: Tape the area to protect the rest of the nail. Brush the metallic polish with care.
22. Glitter Gradient
- Design: Start with heavy glitter near the cuticle and fade it out near the tip.
- Tips: Use a sponge to dab the glitter polish gradually. Seal with a clear top coat.
23. Abstract Floral Lines
- Design: Combine abstract lines with simple flower shapes.
- Tips: Draw light lines first and then fill them with color. Use a thin brush for details.
24. Bold Brushstrokes
- Design: Use broad brush strokes in varying pastel colors.
- Tips: Use different brush sizes. Experiment on one nail before painting all.
25. Iridescent Finish
- Design: Apply iridescent or pearlescent polish on the nails.
- Tips: Layer thin coats to build the effect. Let each layer dry before applying the next.
26. Pastel with Neon Edges
- Design: Paint nails with a pastel gradient and add a neon outline.
- Tips: Use a makeup sponge to create the gradient. Trace the edges with neon polish.
27. Lace Patterns
- Design: Create a lace pattern using fine lines.
- Tips: Use a dotting tool to make the lace effect. Practice on paper first if needed.
28. Mixed Media Collage
- Design: Combine matte, gloss, and foil on one nail.
- Tips: Choose parts of the nail for each texture. Fix each section with a top coat.
29. Fruit-Inspired Design
- Design: Use colors that remind you of fruits like lemons or berries.
- Tips: Create a soft gradient and add small details that resemble fruit slices. Use a stamping tool for small shapes.
30. Abstract Pastel Mix
- Design: Use various pastel colors in random patterns.
- Tips: Apply free brush strokes. Balance colors by stopping and assessing your work.
Step-by-Step Tutorials for Three Designs
Below are three tutorials. Each tutorial gives clear, simple steps.
Tutorial 1: Pastel Ombre Nails
Materials:
- Acrylic nail kit
- Base coat and top coat
- Pastel nail polishes (2 or 3 colors)
- Makeup sponge
- Nail file and buffer
Steps:
- Clean and shape your natural nails.
- Apply a base coat on the nails.
- Extend your nails with the acrylic product.
- Paint nails with the lightest color over the entire nail.
- Let the color dry completely.
- Apply drops of pastel colors on a makeup sponge.
- Dab the sponge on the nails to blend the colors.
- Use a small brush to fix the edges if needed.
- Apply a top coat for a smooth finish.
Tips:
- Allow each layer to dry well.
- Reapply the top coat every few days.
Tutorial 2: French Style with Glitter
Materials:
- Acrylic nail enhancements
- White polish for tips
- Pastel polish for the base (e.g., soft pink)
- Glitter polish or loose glitter with adhesive
- Nail striping tape
Steps:
- File and shape the acrylic nails.
- Apply a base coat and let it dry.
- Use nail tape to cover the area you do not want to paint with white.
- Paint the tip area with white polish.
- Remove the tape when the white polish is dry.
- Apply glitter polish on the free edge or use adhesive with loose glitter.
- Seal the design with a clear top coat.
Tips:
- Use a fine brush for better control.
- Try different sizes of glitter for varied effects.
Tutorial 3: 3D Floral Elements
Materials:
- Acrylic nail supplies
- 3D nail art product (gel or acrylic embellishments)
- Fine nail brush or dotting tool
- Nail decals (optional for guidelines)
Steps:
- Paint the nails with a solid pastel base.
- Lightly sketch the flower design on selected nails with a fine brush.
- Mix the 3D product and apply small dots where the flower parts belong.
- Shape the dots to create petal forms.
- Paint around the 3D elements to blend the design.
- Apply a thick top coat to secure the design.
Tips:
- Work in thin layers for each element.
- Use a primer before adding 3D parts.
Practical Applications and Daily Style
You can use acrylic nail art for many events. The following points help you match your nails to your style.
- Work Settings:
Choose simple designs like the French style or solid monochrome. They are clear and neat. - Social Events:
Bold styles such as neon accents or glitter gradients work well. They add a fun look to your appearance. - Seasonal Changes:
Match your nail colors with your clothing. Pastels pair well with light summer fabrics.
Follow these steps to care for your nails:
- Fill in the gaps every 2 to 3 weeks.
- Apply cuticle oil and hand lotion daily.
- Wear gloves when cleaning to protect your nails.
- Choose proper removal methods with care or use professional help.
Case Studies
This section shows how different people use acrylic nail art.
Case Study 1: Salon in New York
A salon in New York offers a spring collection. They study color trends and design ideas. They ask customers for their opinions. The salon increased bookings by 30%. Clients liked the new nail styles.
Case Study 2: DIY Nail Art Online
A beauty influencer makes videos on acrylic nail art. She shows clear steps in her tutorials. Her videos teach simple techniques. Many viewers follow her advice. This method helps viewers learn clear design practices.
Challenges and Solutions in Acrylic Nail Art
People face difficulties with acrylic nail art. This section lists common issues and their solutions.
Common Issues
- Application Problems:
Acrylic may look lumpy if not applied evenly. - Nail Health:
Incorrect application or removal may harm natural nails. - Design Details:
Small patterns require practice.
Solutions
- Learn proper techniques through training or online videos.
- Use high-quality products and reliable tools.
- Follow regular nail care routines.
- Practice simple designs before trying advanced patterns.
Future Trends in Acrylic Nail Art
Trends in nail art show new ideas each season. Some trends for spring include:
- Digital Previews:
Apps let you view designs before they are applied. - Eco-Friendly Products:
Manufacturers create less toxic acrylic formulas. - 3D and Mixed Media:
Designers combine 3D items with flat painting. - Personalized Designs:
Online tools suggest designs based on personal style. - Collaborations:
Nail artists work with fashion designers on new ideas.
These trends bring new options for nail art creation. They use common tools and straightforward instructions.
Expert Tips for a Good Finish
Follow these steps to improve your acrylic nail art:
- Use a Good Base and Top Coat:
A strong base protects your natural nail. A clear top coat keeps the design intact. - Practice Regularly:
Use simple designs and then try more details as you gain skill. - Work in a Clean Space:
Ensure no dust or debris interferes with the acrylic application. - Keep Updated:
Read online guides and watch videos to learn new techniques.
Tools and Resources
Consider these items to improve your nail art skills:
- Acrylic Nail Kits:
Buy kits that include acrylic powder, liquid monomer, files, and buffers. - Video Tutorials:
Visit sites like YouTube for clear nail art tutorials. - Professional Blogs:
Read articles from sites such as Nailpro and Allure. - Social Media:
Follow nail art pages on Instagram and Pinterest. Use tags like #AcrylicNails, #SpringNails, and #NailArtTrends to see more ideas.
Frequently Asked Questions (FAQs)
1. What Are Acrylic Nails?
Acrylic nails are a mix of polymer powder and liquid monomer. They form a hard layer on your natural nails.
2. How Do I Maintain My Acrylic Nails?
Clean your nails and fill them every 2 to 3 weeks. Use cuticle oil and hand lotion every day. Remove the nails with care or see a professional.
3. Can I Do These Designs at Home?
Yes. Start with simple designs such as pastel ombre or glitter accents. Practice on one nail before painting all nails.
4. Which Tools Do I Need?
You will need an acrylic nail kit, brushes, nail files, buffers, and nail tape. Use a makeup sponge for gradients.
5. How Can I Make My Nail Art Last?
Allow each coat to dry completely. Use a reliable top coat. Take good care of your nails with regular touch-ups.
6. Are Acrylic Nails Safe for My Natural Nails?
Acrylic nails are safe if applied and removed properly. Follow proper techniques or get help from a professional.
7. What Are the New Trends in Spring Nail Art?
Look for digital design previews, eco-friendly products, and 3D or mixed media designs. Follow online trends for personalized suggestions.
Conclusion
This guide gives 30 acrylic nail ideas for April. It explains how to create designs that work for spring. The text uses clear sentences that follow a subject-verb-object order. Follow the clear steps for each design. Use the tutorials for guidance. Practice makes your nail art better.
Enjoy the simple instructions. Experiment with colors and patterns. Share your results with friends or on social media. Comment on your favorite style or ask questions. Explore new ideas by visiting the links and watching videos.